반응형
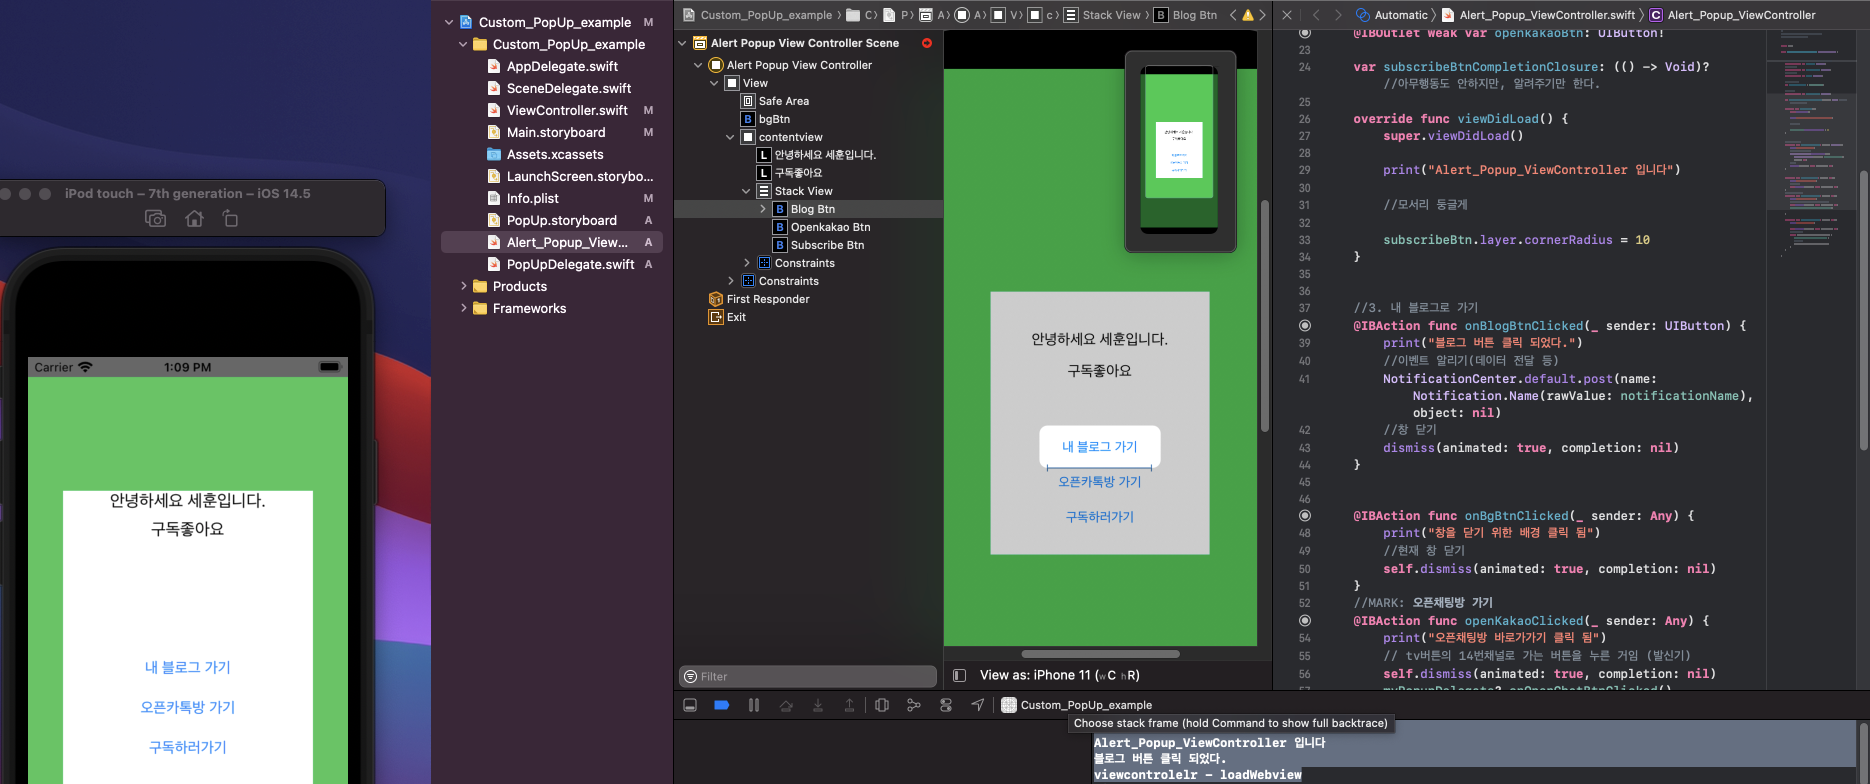
3. notification center
전 포스팅 된 것과 비교하여 바뀐 점 -> 3. --
내 블로그 가기 버튼을 클릭하면, main view controller에 post함수를 통해 이벤트가 전달 된다.
또한 특정 데이터를 전달 할 수도 있다.
//
//  ViewController.swift
//  Custom_PopUp_example
//
//

import UIKit
//인터넷을 사용할거기 때문에
import WebKit

//3. 안테나를 달거임 (주파수 이름)
let notificationName = "btnClickNotification"

class ViewController: UIViewController,PopUpDelegate {
    // MARK: popup delegate method 연결시켜줌
    func onOpenChatBtnClicked() {
        //수신기
        print("뷰 컨트롤러의 onopenchatBtnClicked")
        let myChannelUrl = URL(string:"https://fffounding.tistory.com/")
        self.myWebview.load(URLRequest(url: myChannelUrl!))
    }


    //webView 끌어서 가져옴
    @IBOutlet weak var myWebview: WKWebView!

    //클릭 버튼 정의
    @IBOutlet weak var popUpBtn: UIButton!

    //3. notification 등록 해제 !!! 필수!!! 옵저버를 해제하지 않으면 메모리 낭비가 된다.
    deinit {
        NotificationCenter.default.removeObserver(self)
    }

    override func viewDidLoad() {
        super.viewDidLoad()


        //3. notification이라는 방송 수신기를 장착한다.
        //주의할점 : notification은 항상 이벤트를 수신한다. 따라서 등록을 했으면, 꼭 !!! 해제도 해줘야한다.
        NotificationCenter.default.addObserver(self, selector: #selector(loadWebView), name: NSNotification.Name(rawValue: notificationName), object: nil)
    }

    //3. 특정 방송이 들어왔을 때, 이 loadwebview라는 메소드
    @objc fileprivate func loadWebView(){
        //로직 : 1.버튼 클릭, popUpView 닫힘, mainview에서 이벤트 전달 받은 후 webView 띄어줌
        print("viewcontrolelr - loadWebview")
        let myChannelUrl = URL(string:"https://fffounding.tistory.com/")
        self.myWebview.load(URLRequest(url: myChannelUrl!))
    }


    //버튼 클릭 시 실행
    @IBAction func createPopUpBtnClicked(_ sender: UIButton) {
        //팝업 버튼 클릭 시
        print("viewcontroller called")

        //스토리보드 가져오기
        let storyboard = UIStoryboard.init(name: "PopUp", bundle: nil)
        //스토리보드를 통해 popup view controller 가져오기
        let alertPopupVC = storyboard.instantiateViewController(withIdentifier: "AlertPopupVC") as! Alert_Popup_ViewController

        //팝업 효과 설정
        alertPopupVC.modalPresentationStyle = .overCurrentContext
        // 뷰컨트롤러가 사라짐
        alertPopupVC.modalTransitionStyle = .crossDissolve //스르르
        //메인에 알림
        alertPopupVC.subscribeBtnCompletionClosure = {
            print("컴플레션 블럭이 호출 됨")
            let myChannelUrl = URL(string:"https://fffounding.tistory.com/")
            self.myWebview.load(URLRequest(url: myChannelUrl!))
        }
        //수신기 발신기 연결시켜주는 부분
        alertPopupVC.myPopupDelegate = self

        //다른 뷰 컨트롤러를 보여주는거
        self.present(alertPopupVC, animated: true, completion: nil)
    }

}
//
// Alert_Popup_ViewController.swift
// Custom_PopUp_example
import UIKit
class Alert_Popup_ViewController: UIViewController {
//3. 이런 버튼들을 가져오는 이유가.. 버튼 꾸며줄려고(개인적인 생각)
@IBOutlet weak var blogBtn: UIButton!
//구독하러가기 버튼
@IBOutlet weak var subscribeBtn: UIButton!
//bg button
@IBOutlet weak var bgBtb: UIButton!
//delegate 설정
var myPopupDelegate : PopUpDelegate?
//오픈 챗 버튼
@IBOutlet weak var openkakaoBtn: UIButton!
var subscribeBtnCompletionClosure: (() -> Void)? //아무행동도 안하지만, 알려주기만 한다.
override func viewDidLoad() {
super.viewDidLoad()
print("Alert_Popup_ViewController 입니다")
//모서리 둥글게
subscribeBtn.layer.cornerRadius = 10
}
//3. 내 블로그로 가기
@IBAction func onBlogBtnClicked(_ sender: UIButton) {
print("블로그 버튼 클릭 되었다.")
//이벤트 알리기(데이터 전달 등)
NotificationCenter.default.post(name: Notification.Name(rawValue: notificationName), object: nil)
//창 닫기
dismiss(animated: true, completion: nil)
}
@IBAction func onBgBtnClicked(_ sender: Any) {
print("창을 닫기 위한 배경 클릭 됨")
//현재 창 닫기
self.dismiss(animated: true, completion: nil)
}
//MARK: 오픈채팅방 가기
@IBAction func openKakaoClicked(_ sender: Any) {
print("오픈채팅방 바로가가기 클릭 됨")
// tv버튼의 14번채널로 가는 버튼을 누른 거임 (발신기)
self.dismiss(animated: true, completion: nil)
myPopupDelegate?.onOpenChatBtnClicked()
}
@IBAction func subscribeClicked(_ sender: Any) {
print("구독하러가기 버튼 클릭 됨")
self.dismiss(animated: true, completion: nil)
//컴플레션 블럭 호출
if let subscribeBtnCompletionClosure = subscribeBtnCompletionClosure {
//메인에 알림
subscribeBtnCompletionClosure()
}
}
}주의할 점 ! observer 등록을 하였으면 해제도 필수도 해줘야 메모리 낭비를 막을 수 있다.
반응형
'개발언어 > Swift' 카테고리의 다른 글
| IOS 이미지 슬라이드 (0) | 2021.09.14 |
|---|---|
| 스위프트 사진,동영상 촬영 (0) | 2021.08.17 |
| 프로토콜 델리겟 패턴(protocol delegate pattern) (0) | 2021.08.16 |
| 스위프트 커스텀 팝업창 만들기(create custom popup) (0) | 2021.08.15 |
| 스위프트 네비게이션 탭 바(navagation tab bar) (0) | 2021.08.12 |